 Our design team member, Staci Potter filmed a Special Feature video over on My Craft Channel. She explains why using transfer tape is so crucial when crafting with vinyl. You can view it here….


Our design team member, Staci Potter filmed a Special Feature video over on My Craft Channel. She explains why using transfer tape is so crucial when crafting with vinyl. You can view it here….
Filed under Design Team, Transfer Tape, Tutorial, Video, Vinyl Tips & Tricks

I was recently a part of a planning committee that organized a very successful Medieval Feast as a fundraiser for a local camp. I’ll be sharing more details about the event on my own blog later on, but today I want to share how I used Brookie Craft Vinyl to create the key piece to our donation presentation to the camp – the cheque!!

The list of supplies I needed wasn’t very long:
Large piece of foam board
Utility Knife (to cut the foam board to size)
Black Vinyl
Vinyl for the logo (in this case red, yellow, and blue)
Roll of Dry Erase material (Brookie Craft also sells dry erase vinyl that you could use to create sections of writeable spaces on the cheque, instead of covering the whole thing!)

Up first, I needed to cut my foam board. It was just a little too tall for the looks of a cheque in my opinion so I trimmed about 3 inches off to make it more rectangular. I then used the full roll of dry erase material to cover the foam board entirely, and trimmed the edges for a clean finish. As I mentioned above, Brookie Craft also has dry erase vinyl available that could be used to create smaller areas of writeable space.

I used my computer to create the cut files I needed to cut out the logo for the Knights of Columbus (the organization that spearheaded the event, and in turn was making the donation to the camp from the funds raised). In addition to cutting out the logo, I cut out all of the cheque details in black vinyl, using a real cheque as reference so I didn’t miss anything important.
![]()
Once everything was cut it was just a matter of layering the colours to create the logo, and then spacing out all of the cheque information appropriately. Using Brookie Craft’s transfer tape makes this super simple as it is transparent enough to see right through and ensure your design is going right where you need it! If I have cut out a number of different things that don’t necessary go in the same spot, as shown in the picture of the black vinyl all cut out, I like to place my transfer tape over all of it first, and then use either a knife or scissors to cut the sections apart. This way I’m sure to have the right size of tape for each piece and I can keep everything organized – just cut off the section you need as you need it so pieces don’t get lost.
![]()
While I couldn’t actually attend the presentation as I was at a wedding, through the magic of technology I was able to be there via FaceTime and was thrilled to see the looks and hear the applause when our committee was able to present the camp with a cheque for $12,000! We are a very small town, and this event was a collaborative effort by many – we not only made a considerable donation to a great cause, we brought our entire community together in the process, and shone a light on a much needed gem. I hope you can visit my blog in the next week or so to learn more about the event, and some other projects I created for the feast!

Filed under Design Team, Personalize It


Filed under Design Team, Home Decor, Seasonal, Vinyl Tips & Tricks
")
")
")
Filed under Design Team, Seasonal

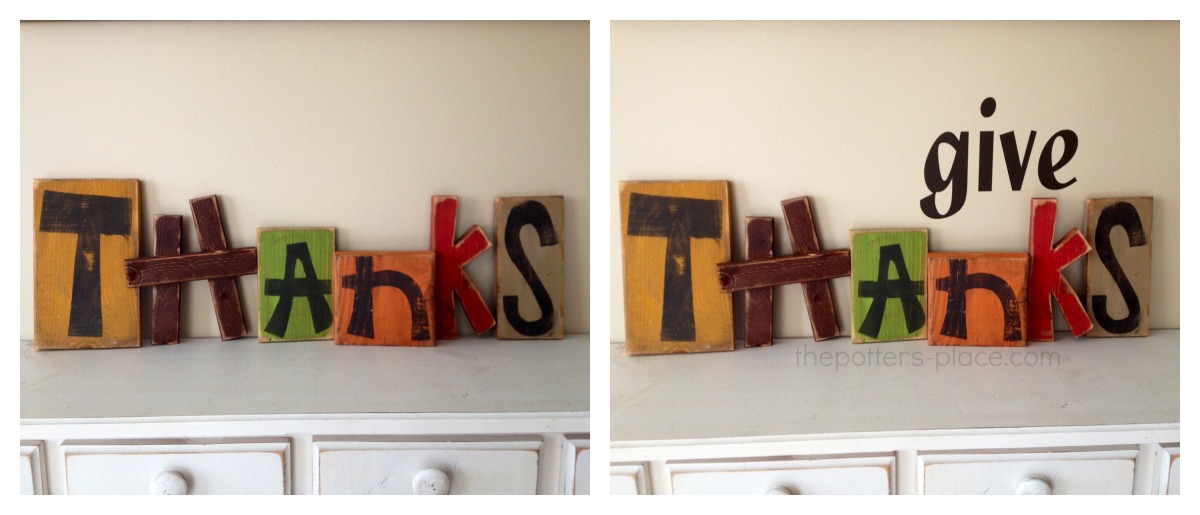
I love to decorate my mantle for the different seasons and one of my favorite ways is with words blocks. I always have a different word on my mantle for each season. This year I made up Some “Gobble Til Ya Wobble” words blocks. I think they are fun and match my other fall items perfectly.
The blocks are made from wood, covered with fall paper and for the lettering I used brown vinyl. I then embellished with raffia and brown ribbon.
Here is a close up of these cute blocks

How do you decorate for fall?

Filed under Chalkboard Vinyl, Decorate Everything, Design Team, Gift Ideas, Home Decor, Seasonal


Filed under Design Team, On the Wall, Seasonal


Filed under Decorate Everything, Design Team, On the Wall
by Tausha Hoyt from Sassy Style Redesign
Maybe I am the only one, but I grabbed the Halloween costume supplies and realized that we had no trick or treat bags. Not exactly sure how this happened, but we are trick or treat bag-less nonetheless.
So, I decided to remedy the situation today. It was super simple and not too hard to do. Good thing, because I need 3 of them.

First things first. You need to gather your supplies

Canvas Bag-I got mine at wal-mart in a 3 pack
Heat Transfer Vinyl-This is made by Brookie Craft. Look for it at a local craft store or online at vinyloutlet.net You can look for this under the Sillouhette name.
Iron
Scrap Fabric for ironing
Anything that only has 4 supplies needed, is bound to be simple…right? Of course it is.
First, I used my Cricut to cut out the design. You could totally use a Google image, trace and cut out if you don’t have a Cricut or Silhouette.

When using heat transfer vinyl-you want to make sure that flip or mirror your image. Also, the matte side is the side that is facing up. The shiny side down.
Once your image is cut, you need to take it off of the transfer tape or clear acrylic side. Just peal it off. Super simple. Wa-hoo!
After your image is placed, you are ready to iron. This is where your scrap piece of fabric comes into play.

After you have the fabric over your image, use a no steam iron set on the cotton setting. Lightly iron over the image and it will set almost immediately.
After that, you are ironed and done!

I told you it was simple! I guarantee that your kids will have the cutest trick or treat bags around.

Filed under Design Team, Heat Transfer Vinyl, Kids Crafts, Seasonal

This is super quick and easy to make – so lets get started!
Materials Needed:

Cut the board to the size that you want and sand then paint black. Then cut your scrapbook paper to be slightly less in size than the board. I usually cut mine to be 1/4 or 1/2 inch smaller.

Mod Podge the scrapbook paper onto your wood board.

Cut out a fun Halloween word with your vinyl – I cut out Beware

Add the vinyl to your wood board

Now with your black embroidery floss criss cross it around the board – like a spider web. Then tie into a knot. You could tie the knot in the back but I like the look of the knot tied in the front.

And there you have it – a fun, quick and simple Halloween Sign.

Filed under Design Team, Gift Ideas, Home Decor
Here’s a simple way to personalize gifts or add some flair to a party! These glasses (actually shatter-proof plastic that looks just like glass!) were made as part of the thank you gifts for a wedding party.

I used the cricut cartridges Love Struck for the lips and CTMH Artiste for the moustaches! Since these glasses have grooves built in for the thumb to sit in, the vinyl was applied so that when they were held up to the mouth, the lips or moustaches were in just the right spot on the drinker’s face – totally made me giggle after applying each one LOL


My tip for designing vinyl for curved areas, like glasses, is to take the measurement of the area you can see from one angle. For the flutes for example, about 2 inches were visible at any given time, any more than that was cut off as it curved around the glass. Knowing this, I could try to keep my designs within 2 inches wide so that the name could be read and the image could be legible when it was looked at straight on.
Don’t forget to test out your vinyl on your objects before you finish a project like this so that you’ll know how they interact. Some glass doesn’t hold certain vinyl as well as other glass. I would also recommend hand-washing any items that will be used again, not putting them in the dishwasher.

Filed under Design Team, Gift Ideas, Personalize It

