Spring Time Polka Dot Jar
Filed under Decorate Everything, Design Team, In the Kitchen
Using Vinyl to Writing on Dishes
Have you ever thought to write on dishes? My handwriting is not so great so when I want clean lines and the perfect lettering I use my vinyl as a stencil.
Here’s some screen shots from the Inspired by Pinterest episode called “Writing on Dishes” on My Craft Channel.
Filed under Decorate Everything, Design Team, In the Kitchen, Personalize It
Chocolate Bunnies Sign
I add a layer of Mod Podge over the top to make sure the vinyl doesn’t peel up. It usually does not – but I like to make sure.
Filed under Design Team, Seasonal
Candle Jars: Vinyl as a Stencil

Filed under Design Team, Home Decor, Sticky Stencils
Lucky as Can Be St. Patricks Sign
In trying to keep with my Lucky theme for my St. Patrick’s Day decor I made this little Lucky board to sit on my shelf. This one is so super simple and quick!
First start with a board and paint it white. Then pick a really cute piece of cardstock and cut it to the size you want. Then using Mod Podge adhere it to your board. Here is my board with my cute paper
Wait for the Mod Podge to dry then add a cute vinyl word. My vinyl says “Lucky as can be!!”
Add some Mod Podge over the top to seal everything together and let dry. I think this turned out so cute and took no time at all!
If you liked this you may want to check out my Lucky wood blocks as well.
Filed under Design Team, Home Decor, Seasonal
Valentine Treat Plate
Filed under Design Team, Gift Ideas, In the Kitchen
Adding Vinyl to Accent your Chalkboards
I love Chalkboards! I love words and so chalkboards are the perfect solution for me. If I didn’t have them, I would be one of those people who hung words all over the house using construction paper and scotch tape.
If you are not sure how to make a chalkboard, I tell you how to do it here. It really is easier than you think.
I wanted my chalkboard to have a little something extra and unique detail. So, I added a little bit of vinyl love. I have done this a couple of times and every time I do it, I love it more and more.
Now that you have your chalkboard all decked out and you are not sure what to write on your board-I have a hundreds of quotes on my Chalkboard Quotes Board on Pinterest.
If you are wanting some simple tips on how to write on your chalkboard-I did a whole post all about this as well. Simple, life changing tips. (Well not really life changing, but you get the idea)
If you want more simple project ideas, DIY and decorating tips and tricks, please visit my blog

Filed under Chalkboard Vinyl, Design Team, Home Decor
Snowflake Candles
Before I pull out the Valentine decorations I decided to decorate a little bit for winter. As part of my winter shelf display I made these cute Snowflake Candles. The best part was how inexpensive and easy it was to put together!
I bought these candles from the Dollar Tree – so I spent only $3
Filed under Design Team, Seasonal
Simple Valentines Canvas Decor by Tausha
I heart the day of love! I really do. I love the pink and red candy, the class valentines and the red pancakes I make for breakfast on February 14th.
The only thing that I don’t really love is the decor options that are available to purchase. Wa-waa 😦
I know that I am not the only one who feels this way, so I thought that I would come up with a simple piece of Valentine’s decor! You are excited..right? Wa-hoo!

Filed under Design Team, Seasonal
Note to Self Dry Erase Board
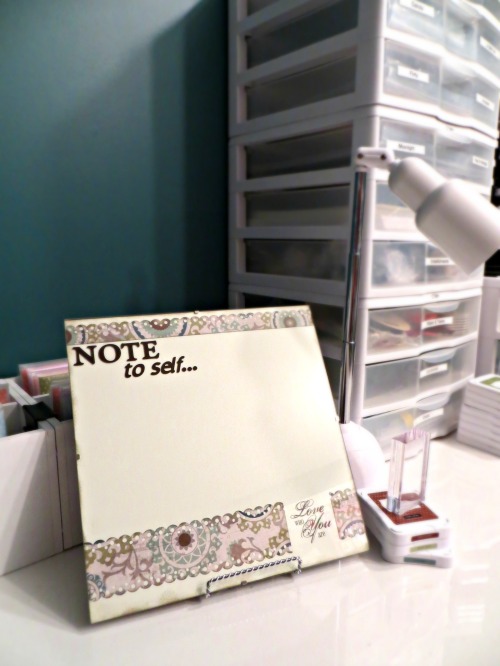
 Laura here again, from KOLA Designs! Today I want to share a project that will hopefully help to organize your life, or at least your to-do list! Today I put together an interchangeable dry erase board using a 12×12″ glass frame, some CTMH paper, stamps, and ink, and a little Brookie Craft Vinyl!

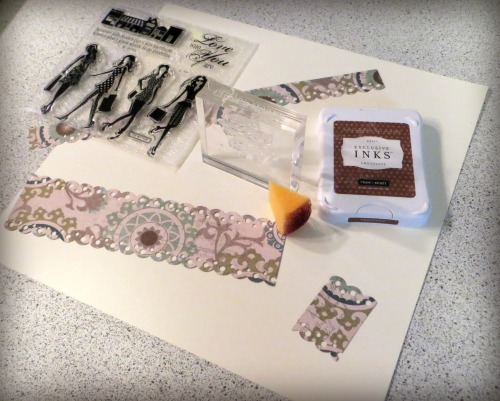
Step one is to create a design to frame – this will be the background for your dry erase board, so you’ll want to keep it fairly simple, especially for a section to write on. I used some Colonial White cardstock and accented it with some patterned paper from the Avonlea set. I added an inspirational quote as well, and after inking the edges, I was ready to put it all together! This particular frame is perfect for this project because it’s pretty much just glass – only 4 little clips to attach the glass to the back, so they don’t get in the way of anything!

Once I had the board put together, I used my Gypsy to design a quick title (“Note to Self…”) using both CTMH cartridges: Art Philosophy and Artiste. Use some transfer tape to attach the new vinyl title, and you’re all set!!

You can use this dry erase board on a stand right on your desk, or even hang it on a wall! Think of the great ways you can use this throughout the year! Just switch out the background paper to match a holiday or even a different room!
Filed under Design Team, Personalize It


